There is a very real tech learning curve to flying with a bike. But, I’ve found that it’s taught me a lot about my bike parts, how they fit together (and how they don’t), the tools I need to adjust them, and troubleshooting when things get persnickety. Strange to say but true: learning how to pack and unpack a bike is making me a better rider (or at least less of a gumby).
This winter, I was invited to hang out with my mom in San Diego while she was at a conference. I had bike workouts that I did not want to miss, but I also refuse to use an indoor bike or trainer (subject for another day). If I wanted to ride a bike in San Diego, I was going to have to either fly with a bike or take my chances on a bike rental for a week, and pay a hefty price for that week. I chose to learn how to pack up and unpack a bike, something I have always been nervous about and also wanted to do. I just did it for a second time this week on our family vacation to Florida. I am happy to say that the second time was a lot easier than the first.
We have a soft Dakine rolling bike bag in our garage that I adapt to store my little Santa Cruz Quincy, which I use for both road and gravel riding. The bag fits up to a huge 29er mountain bike, and it feels very roomy for my Quincy, but not too roomy.
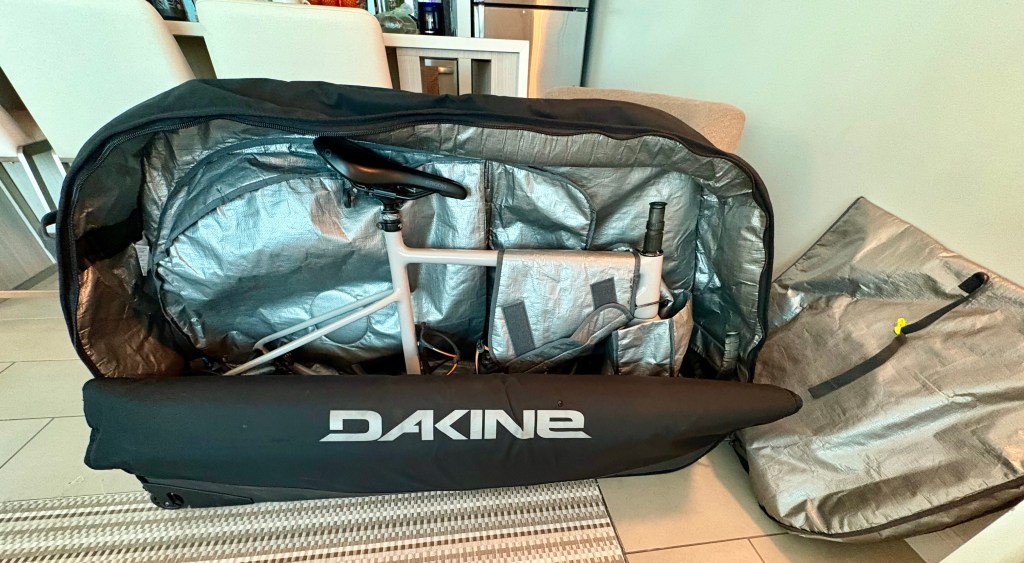
I have a United card, so I check my first bag free and second bag for $50. My bike bag is tagged as oversize luggage, but costs the same as a regular-size second bag. Total, it’s $100 to fly my bike to and from if I need to check an additional bag. However, bear in mind that when I need to Uber to/from the airport, I have to order an XL to fit the bike bag and luggage, which can become quite pricey and also a tight squeeze if there are multiple passengers.
An additional cost is the time it takes to pack and unpack the bike and the hassle of getting it from point A to B in one piece to ride it away from home. I’m not a naturally gifted bike mechanic. Learning how to disassemble and reassemble my bike for flights has taught me a lot about the parts of my bike, the tools needed to adjust them, and how they work together. Additionally, each time I’ve traveled, I’ve had to troubleshoot one mechanical issue or another while not at home. And, each time I’ve managed to solve the problems and get out on my bike in a new place. It’s been a big learning curve but also a confidence booster to make it all work.
To figure out how to disassemble my bike and pack it, I watched several videos, but this one I’m sharing here is both the most helpful AND the most entertaining by far. Joann Berelli, king of making sketchy lines look NBD, demonstrates how he takes apart his mountain bike and packs it up in the same Dakine bag that I have in real time. You can see him handle every bike part, watch him select hexes, and you even witness him thinking to himself: where do I start, what do I take apart first?
Rather than me enumerating the steps, watch the video.
Worth emphasizing: an important thing I learned from the Joann vid is that when you unscrew something to loosen or remove a part, screw it back in place if you can to avoid losing small parts.
What’s not in the vid:
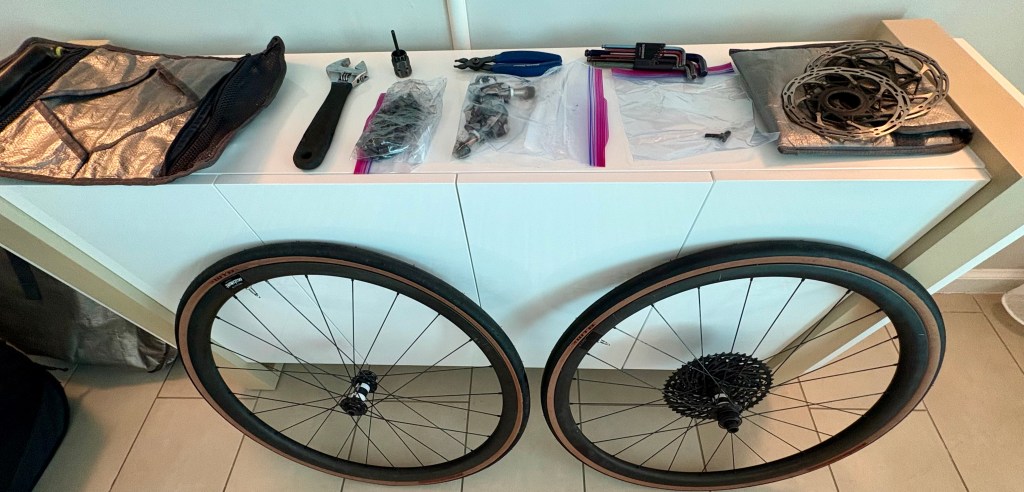
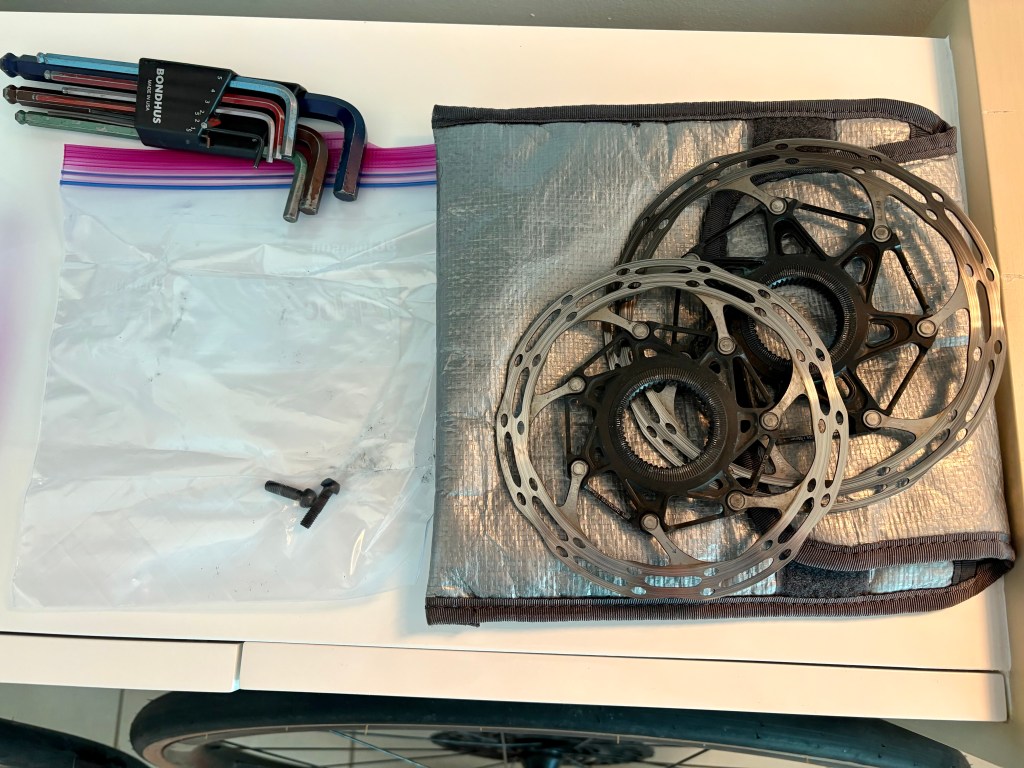
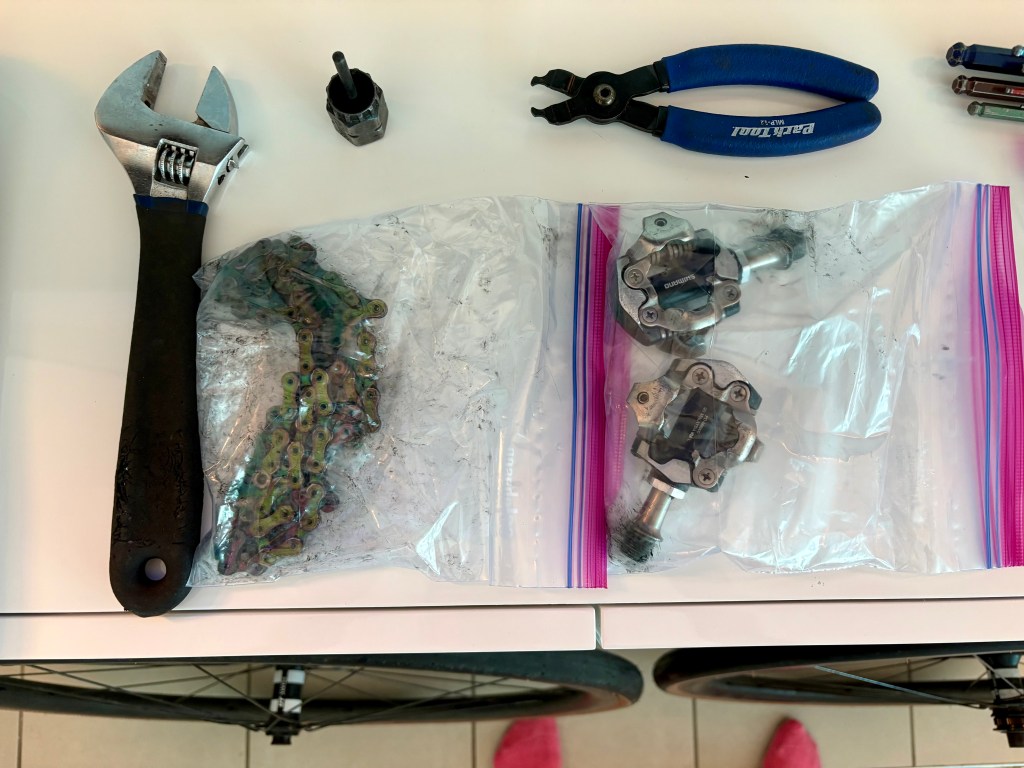
- Joann’s tools wound up being different than mine – he mostly just used a multitool. The tools you need to bring depend on your specific bike components. For example, his rotors did not require a lockring tool and wrench. Here’s what I bring for my Quincy in the tool bag that comes with the Dakine bike bag (left side, in the photo below): hex set, wrench and cassette lockring tool to remove rotors, and a chain breaker tool. I also have the toolset in my OneUp pump that goes on my bike (has a multitool and tire lever inside, and other goodies). I also take in 3 separate ziplock bags: my chain, pedals, and the screws that I take off my headset. The rotors have their own separate silver pouch that also comes with the Dakine bag. The ziplock baggies go in the silver roll-up tool kit to keep everything together.
2. I take my chain off, whereas Joann leaves his on. The chain and links travel in their own plastic baggie in the toolkit bag. This is actually how I learned to take off and put a chain back on!
3. There is a pocket on the outside of the fork case that appears to be for the toolkit. However, I learned that during flight and handling, this heavy toolkit winds up falling out of this pocket and bouncing around the inside of the case, which I do not like. I’m still looking for a good solution to this, besides carrying the toolkit in my suitcase.
4. I get nervous about my derailleur, disconnected for packing, bouncing around in the bag, so I wrap it in a handtowel and tie a bandana around it. This will keep it from getting damaged and also from damaging my frame if TSA does not handle with care. UPDATE: my husband sent me a product link to a derailleur bag that keeps it in place during travel. I just bought it.
5. The Dakine bag is made for straight bars, not curly, and straight bars have a padded velcro wrap that holds them in place to the side of the fork. Curly bars don’t fit in this little burrito. I’ve handled this in two different ways. The first time, I strapped them in place myself because I was worried about brakes and shifters being damaged if the handlebar moved around in the soft bag. The second time I flew with this bag, I forgot to strap the handlebar down, but it appears to have arrived just fine. Time will tell.
Finally, there will be a lot of dead space in this bag that you can use for soft items: extra microfiber towels, spare tubes, empty water bottles for riding, empty handlebar bag or frame bag, and I have even packed my riding clothes in the bike bag (in their own separate bag). I also found that adding a little weight can help the bag stay upright while rolling it around the airport. (Add too much weight and it feels like a body bag.)
6. Reassembly – Joann does not include a video of him reassembling his bike at his destination. The first time I tried to reassemble, I couldn’t remember which size rotor goes in the front of the bike, and then I also put it on flipped inside-out — and wondered why my wheels didn’t slide into place as they usually do. It doesn’t take much at the end of a long travel day to find yourself sitting in a circle of bike parts on your hotel floor, greasy, exhausted, cursing, and wondering what the heck went wrong. Give yourself extra time to put your bike back together so that it’s safe to ride, and bring a couple microfiber towels in the bike bag because it can get really greasy. Don’t be afraid to phone a local bike shop or a friend for help.
7. Pack a travel pump *that you know works* as well as chain lube. If you’re running tubeless, bring multiple tubes as backups. (Remember that you cannot fly with CO2 cartridges!)
I am actually still searching for a travel pump that works well with tubeless tires and that I like. Any recos? I have a crappy mini pump that is barely worth mentioning here.
Last thought: Before leaving, figure out where your nearest bike repair shop is at your destination and know their hours. Both times I’ve flown with my bike, I’ve needed a shop nearby for a little help with a tire that got finicky about inflating after flying. My coach even recommends calling ahead to schedule time at the shop for bike repair if you think you’ll need an extra hand. I always envision reassembly to be smooth sailing and imagine waking up on day 1 of the trip to hop on my bike and pedal away. I have yet to have that carefree experience, but I do have the experience of problem solving and enjoying my rides away from home even more for the effort. Prepare for hiccups, and then if you don’t have them, tell me how that feels and celebrate feeling like a boss.
~ currently on family vacation with my bike on Marco Island, Florida ~

Leave a comment